Your retail store's layout shapes how customers experience your brand and influences their buying decisions. And while there's no single "perfect" layout, some retail designs are proven to perform better than others.
A product placed near a cash register will attract more attention than a product placed just by the door, for example. After all, it’s more likely that a customer will see the product near the cash register while waiting to check out, whereas shoppers will breeze past the products positioned right by the door as they enter or exit.
The good news? We've done the research for you. In this guide, we'll share the most effective retail store layouts and design tips—backed by real-world success and customer psychology— so you can create a space that not only looks great but also increases sales.
What is a retail store layout?
Retail store layout, also known as store design or layout design, refers to how retailers arrange product displays, fixtures, and merchandise. It influences the shopper's experience in the store and their likelihood of making a purchase.
The impact of store layout on customer behavior
A retail store's layout can affect whether it attracts customers, how long they stay, which products have the best sell-through rate (and which don’t), and whether customers are likely to return.
Store design can also help you achieve retail merchandising goals by guiding customers through the space and exposing them to your products, while managing sensory cues that drive purchasing behaviors.
The decompression zone: Optimizing the entrance
Once a person steps inside your retail store, they enter the decompression zone: the first 5 to 15 feet. Think of this as a transition space—customers take a broad, sweeping look at the store, and anything placed directly in this area often goes unnoticed.
Shoppers in the decompression zone still adjust to their surroundings and tend to overlook products, so avoid placing key items here, like new arrivals or high-demand products.
The invariant right: Guiding customer flow
According to psychologist and writer Paco Underhill, most shoppers naturally turn right when entering retail stores, and then move in a counterclockwise pattern before exiting. He called this phenomenon “the invariant right.”
Using this knowledge, you can plan to organize your store’s layout so that:
- The right side of your store’s layout begins with shopping baskets and carts for your shoppers’ convenience.
- Your store’s floor plan includes more space to the right of the entrance to reduce bottlenecks if you have an influx of foot traffic.
- High-demand products or special promotions are displayed on a right-hand "power wall.”
Dwell time and impulse purchases
Research shows high dwell time increases customers’ likelihood of buying in a high-end retail setting. There are two main reasons for this.
First, the more time someone spends in your store, the more products they’re likely to see. This increases product discovery—the longer they browse, the more likely they are to find something they want.
Second, high dwell time can lead to impulse or unplanned purchases. The sunk-cost fallacy may kick in: Customers think, “I’ve spent so much time here, I can’t leave empty-handed.”
Creating a sensory experience: Sight, sound, and scent in store design
Your store layout isn’t just product arrangement. Modern shoppers want immersive experiences, so optimize for the senses:
- Scent: Vanilla, floral, woody—the best retail stores don’t just look great, they smell great. Studies show almost two-thirds of shoppers say a store’s scent influences where they shop. About 54% say a pleasant scent makes them spend more.
- Lighting: Customers make buying decisions more easily when they can clearly see products. Avoid dark spots and use mood lighting that spotlights your bestsellers.
- Music: Research shows that slow-tempo, low-volume music encourages shoppers to stay longer. Make sure you have the appropriate license to play music in-store.

How to plan your retail store layout: A step-by-step guide
Designing your store layout can feel like a lot, especially when you’re running a small business and wearing many hats. It can also be fun. In most cases, you can iterate and test merchandising strategies to see what works best for your business.
1. Define your goals
“Generate sales” is the most obvious goal of a retail store, but go deeper into what you want from a customer when they step into your store—even if they don’t buy.
That might include:
- Buying a particular product, such as a high-margin item or a hero product you want to be known for
- Giving you customer data to use in retargeting campaigns
- Deterring theft and inventory shrinkage
Your retail store’s layout should reflect these priorities. A skincare brand that wants to be known for its acne-treating moisturizer, for example, should make this hero product visible from the entrance and make it the focal point of visual merchandising displays.
2. Analyze your space and existing infrastructure
Retail space is expensive—the average price per square foot has steadily increased over the past five years, reaching $21.95 in the first quarter of 2025.
Instead of opening a second location or expanding your retail floor plan (both of which add to your operating costs), optimize what you have. Build vertically with shelving units and wall displays if you’re short on floor space.
Account for any fixed furnishings such as light switches and outlets. For example, you don’t want extension cords trailing around your store, so make sure that your point-of-sale (POS) system and checkout desk are near an outlet.
3. Map the customer journey and desired flow
You’ll want shoppers to see your best and most appealing merchandise and displays when they walk into your store. For this reason, knowing where people turn after entering your shop is key. Do they usually flow to the right or the left? What do they notice first?
You can monitor your customer flow in a few ways:
- Analyzing purchase data
- Observing the number of people who come into the store
- Using thermal foot traffic counters like Dor
- Reviewing a time-lapse video, if you have an in-store camera
Use this data to identify flow patterns, store areas visited frequently or overlooked, the number of visitors, and overall customer behavior.
4. Choose the right layout type for your business
The best layout for one retail store won’t be the same for another. It depends on the products you’re selling, the experience you want to create, and how customers behave in-store.
Grocery stores, for example, stock large volumes of inventory on vertical shelves organized by category. Luxury brands use negative space and plush fixtures to create a sense of exclusivity. Electronics retailers might group products by use case with interactive demo areas.
If you’re unsure of what your store should look like, take a field trip. Visit local retailers and take notes on their store design. If most of them share similar qualities, there’s a reason for that.
5. Select fixtures and merchandising tools
Once you have a rough idea of what an effective store layout looks like for your business, choose the fixtures and fittings you’ll need to make it a reality.
Again, this largely depends on the design you’ve chosen:
- Grid layouts: Use gondola shelving, vertical racks, and end caps to create clean, consistent aisles.
- Free-flow layouts: Use lower-profile, movable fixtures to keep the layout flexible and visually open.
- Loop layouts: Choose curved or directional fixtures to guide movement around the store.
6. Consider accessibility and legal compliance
Many countries—including the US—have laws that say retailers should make “reasonable adjustments” so people with disabilities can access their stores. Noncompliance can be expensive both in terms of regulatory fines and lost customers.
Before you commit to your store’s layout, ensure accessibility with:
- Clear, high-contrast signage
- Wider aisles and ramps
- Quiet zones or low-sensory areas
- Adjustable checkout counters
- Inclusive fittings, such as lower shelving and mirrors
Beyond these general principles, make sure to review specific federal, state, and local guidelines governing access at your store’s location. Even if you set out with the best intentions, you could be hit with costs of fines and redesigns if you miss out on specific details.
7. Set a budget for design and implementation
Opening a retail store isn’t cheap—studies estimate the startup cost is just shy of $40,000. Most of the upfront costs come from the store’s build-out, such as design and consultancy fees, lighting systems, and furniture.
Before you commit to a store redesign, decide how much you want to spend on the build-out. Without a budget, it’s easy to splurge on an extra shelving unit here and a fancy chair there, and those “minor” costs can add up quickly. Roughly $155 per square foot is the ballpark build-out cost for a retail location.
Retail store layout ideas
- Grid store layout
- Herringbone store layout
- Loop or racetrack layout
- Free-flow layout
- Boutique store layout
- Straight or spine layout
- Diagonal store layout
- Angular store layout
- Geometric store layout
- Multiple or mixed layout
- Popup shop layout
- Showroom layout
1. Grid store layout
In a grid layout, merchandise is displayed in long aisles where customers weave up and down, browsing as they go. The grid maximizes product display and minimizes white space—convenience stores, pharmacies, and grocery stores use this familiar layout.
The grid layout features long aisles with impulse-purchase items near the front and staple items at the back. The ends of aisles are prime real estate, and many retail stores use additional features such as wing shelves to highlight products more effectively.
If you have ever wondered why milk is at the far end of a grocery store, it's because this design forces customers to walk past multiple impulse purchase items on the way to and from the staple item they need.

If you operate a shop where customers pick up multiple types of items that aren’t naturally grouped together (think shampoo and greeting cards), you may want a layout that makes it easy to browse the whole space and find what they’re looking for.
The grid creates natural barriers that both group similar products together and separate different product categories. This can help clear up confusion about where to find things in a shop with a high number of SKUs.
Furthermore, customers are highly accustomed to this layout, so flowing up and down aisles is second nature to most shoppers.
Pros of the grid store layout include:
- It’s the best retail store layout for brands with lots of merchandise, especially when products are varied.
- There’s lots of readily available infrastructure (e.g., shelving) because this layout is widely used.
- It’s familiar to shoppers.
- Four-foot-wide aisles help prevent customers from bumping into one another.
- Predictable customer traffic flow means you can put promos where you know customers will see them.
- Lots of infrastructure suppliers, such as shelving, are available as this layout is used so much.
- Best practices within this layout are well-researched.
Cons of the grid store layout include:
- It’s less likely to create an experiential retail space.
- Customers may be frustrated they can’t shortcut their way to what they need.
- Customers may not understand your product groupings, leading to frustration and questions (or worse, departure),
- Few visual breaks and lots of merchandise can make customers feel overwhelmed.
Some of these cons can be addressed with creative interior design that uses shorter shelving to make the space feel more open and adds clear signage so customers can see product groupings.
2. Herringbone store layout
If you think the grid may be best for your merchandise but have a very long, narrow retail space, the herringbone layout is one to consider.

Convenience stores, small hardware stores, and many small community libraries use the herringbone layout to pack a tiny space full of wares. The side aisles can be used for promotions, but adding occasional visual breaks within the promo areas can provide much-needed breathing room to an otherwise overwhelming space.
Some herringbone bookshops encourage people to linger by setting up a comfy chair at the end of an aisle, where shoppers can leaf through books before they decide to buy.
You’ll find large warehouse-style stores use the herringbone layout as well. IKEA's convoluted loop track is replaced by the herringbone when you're in the pickup area, and the shopper's intention changes from browsing to purchasing.
Pros of the herringbone store layout include:
- It’s suited to stores with lots of products but minimal space.
- This layout often works well for warehouse-style stores open to the public.
Cons of the herringbone store layout include:
- Limited visibility down side aisles can increase the risk of shoplifting.
- Can feel cramped, and customers may bump into one another.
A big potential downside of the herringbone is theft. However, one way to mitigate the risk is to place security cameras at the end of the side aisles, as visibility from the checkout is likely to be limited.
3. Loop or racetrack layout
The loop, racetrack, or forced-path layout takes the grid's predictable traffic flow further, creating a closed loop that leads customers from the entrance, past most merchandise, and to the checkout. Customers are exposed to most of the merchandise, though the path is controlled.
In the example below, the white path represents the main corridor that traffic flows through, while the central area can use a micro layout that suits the products and space.

IKEA takes the loop layout to the extreme. If you've been to one of its stores, you've probably experienced both the pros and the cons of this design, depending on your shopping intent.
If you're browsing, the experience can be very nice—it encourages wandering, and the creative displays spark ideas for your home. However, if you've gone for a few specific items, it's a frustrating experience. It's no coincidence that haunted houses use the loop layout, too.
The loop layout doesn't have to be frustrating, though, if it's carefully matched to the right use case. One well-considered loop layout application is popup gift shops accompanying time-limited museum exhibitions that continue the exhibit's story by making the shop a natural extension of the display rather than a sudden, jarring retail space.
Pros of the loop store layout include:
- It maximizes product exposure.
- It’s the most predictable traffic pattern, making it easy to place promotions and have the highest assurance they’ll be seen.
- It can be experiential, which can work with retail where a journey makes sense, and time spent in-store doesn’t need to be brief.
Cons of the loop store layout include:
- Customers don’t get to browse at will.
- It may waste the time of customers who know what they’ve come for; they may avoid this shop in the future when buying intent is specific.
- It’s not suited for shops that encourage high traffic turnover or carry products people need to spend little time considering before purchase.
4. Free-flow layout
In a free-flow retail store layout, there is no deliberate attempt to force customers through predictable traffic patterns: wandering is encouraged. There are fewer rules, but best practices still apply—human behavior patterns remain.
Well-designed free-flow layouts can encourage browsing and impulse buys. They are ideally suited to upscale brands and creative shops that want to prioritize experiential retail.
A typical example shows exterior signage, window displays, and, most likely, the start path and power wall remain the same. But beyond that, it’s a very flexible canvas.

Free-flow is often called the simplest store layout because there's no defined pattern, but that can also make it the most complex. How you organize your merchandise in this layout is limited only by your square footage and your imagination.
Pros of the free-flow layout include:
- Great for small spaces
- Also works within areas of loop and spine layouts (more on that below)
- Creates more space between products
- Less likelihood that customers will bump into one another
- Better suited to higher-end shops with less merchandise
- Most likely to create an experiential retail space
Cons of the free-flow design include:
- Often less space to display products
- Easy to forget there are best practices that still should be followed; breaking the unwritten rules can turn people off and away from your store
- Can be confusing for customers
5. Boutique store layout
The boutique store layout, also known as shop-in-shop or alcove layout, is commonly used by specialty stores. Merchandise is separated by brand or category, encouraging shoppers to engage with complementary items in designated areas. Walls, product displays, and fixtures divide areas and create the effect of multiple small shops within a single space.
If you carry multiple brands, this type of retail store layout is a great way to use store design to tell a story about each label.
To encourage full-store exploration, avoid closing off sections too much. Rather than build a wall, use shelving, tables, and racks to create alcoves that people can easily flow in and out of.
Pros of the boutique store layout include:
- It sparks curiosity in shoppers.
- It highlights different brands and product categories.
- It helps with cross-merchandising and cross-selling.
Cons of the boutique store layout include:
- It may limit the total display space for merchandise.
- Shoppers may not explore the entire store.
- Customers may be confused.
6. Straight or spine layout
A basic straight design helps draw customers to the back of the store, ensuring that all featured merchandise is seen. Use signage, product displays, and strategic merchandise to keep customers engaged and moving down the shop's main aisle.
The straight store layout, also called the spine layout, is easy to plan, effective, and creates space for customers to browse. It works for small markets, food retail stores, and large department stores that use the spine as a main aisle to connect the various sections on each floor.

Pros of the straight or spine layout include:
- Customers are more likely to make it to the back of the store.
- Shoppers have space to look around.
- It allows room to display merchandise.
Cons of the straight or spine layout include:
- Shoppers may move quickly down the main aisle, and merchandise at the front or sides of your store may be overlooked.
- A straight aisle may not lend itself well to exploration and discovering new products.
7. Diagonal store layout
The diagonal layout incorporates aisles placed at an angle to expose more merchandise to customers as they walk through the store. It’s a variation of the grid layout and can help guide shoppers to the checkout counter.
This retail store design is helpful for space management, making it a good option for shops with limited space. It also encourages more movement, so customers can easily circulate through the store and see all your products.

Pros of the diagonal retail layout include:
- It allows better customer circulation.
- If the checkout counter is at the center of the store, a diagonal layout provides better security—you’ll be able to see more throughout the store.
Cons of the diagonal store layout include:
- Shoppers cannot take shortcuts to specific products.
- Narrower aisles are common in the diagonal retail layout.
8. Angular store layout
A better name for an angular store layout would be “curved store layout.” The term is deceptive: this layout uses rounded product displays, curved walls and corners, and other curved fixtures that guide customer flow.
The angular layout uses freestanding product displays and can create the perception of higher-quality merchandise, making it a good retail design option for luxury retailers and boutiques.

Pros of the angular store layout include:
- It creates a unique retail store design.
- It elevates the in-store experience.
Cons of the angular store layout include:
- Rounded displays eliminate wall shelf space.
- Less inventory can be displayed.
9. Geometric store layout
The geometric store layout is a great way to combine creativity and functionality. It’s commonly used by retailers selling products targeted at stylish millennials and Gen Z.
A geometric layout can enhance the look of your shop if it has a unique interior, including support columns, wall angles, and ceiling design. You can combine geometric displays and fixtures in various shapes and sizes to make a statement and build your brand identity.
Typically, clothing and apparel stores use merchandising strategies such as artwork, music, and scents alongside a geometric store layout to create an atmosphere that enhances customer experience.

Pros of the geometric store layout include:
- It creates a unique store design without a high cost.
- It helps make a statement about the products.
Cons of the geometric store layout:
- It may be too eccentric for less “trendy” products (or an older audience).
- It may not be the best option to maximize space to display merchandise.
10. Popup shop layout
Popup shops differ from permanent brick-and-mortar stores because they’re temporary. Fixtures and fittings need to be portable, and space limitations mean you have to get creative about building a branded retail experience for visitors.
The free-flow layout often works best for popup shops with limited space. Modular displays mean you can adapt the layout for peak times, while encouraging people to explore.
11. Showroom layout
The showroom retail store layout works best for stores with minimal space. Instead of overwhelming customers with a large assortment of products, it highlights a smaller selection to create a “showroom”-style personalized shopping experience.
Showroom layouts are great for facilitating customer interactions. In most cases, customers can’t pick an item off the shelf and head to the checkout—they’ll need to ask a store associate to retrieve it from the stockroom or place a ship-to-home order.
Plus, the layout is ideal for stores with theft concerns. Fewer products on the shop floor means more visibility into how customers interact with your inventory. And if customers have to ask to buy a product, it reduces opportunities for shoplifting
💡Tip: Shopify lets customers place orders in-store, then have their order shipped directly to their home, from the POS interface.

12. Multiple or mixed layout
You don’t have to choose just one store layout. Some retailers use elements from multiple layouts to create a flexible store design, or a mixed layout. A dynamic mix of diagonal, straight, and angular store layouts can help you create a compelling in-store experience where customers naturally flow from one area to another.
Start with one layout type and build from there. For example, the loop layout lends itself to multiple options—a loop on the outside and a grid or free-flow in the center. Large retail stores, including department stores, often use multiple configurations connected by a single power aisle.
Nordstrom, for example, uses several layouts to differentiate between various branded shops within the store. The department store transitions from a grid-layout Nike store-within-a-store to a free-flow, high-end designer label area embedded in the space. This creates the feeling of different shops, even though they’re all under one roof and umbrella brand.
Strategic retail store layout design tips for 2025
Once you’ve found the right store layout for your retail location, here’s how to make the most of your design.
Design compelling window displays
Your retail window display is one of a potential customer's first touchpoints with your store. With the right design, people are more likely to stop, look, and walk into your shop, giving you a chance to engage and sell. Use it to tell your brand story and catch the attention of passersby.
Babylist, for example, uses large glass windows so passersby can see inside the store. This preview creates an inviting atmosphere—customers know exactly what they’re walking into when they decide to visit.

Consider breaks and stopping points
If all of your fixtures look the same, shoppers may overlook certain merchandise.
Use speed bumps to slow foot traffic and prevent products from being skipped. For example, a shelf stopper highlights an item—the sign juts from the shelf, draws attention, and prompts a pause—making shoppers more likely to browse the entire shelf.
Display the right amount of product
While more merchandise can lift sales, too much can lower perceived value—especially for high-end or boutique retailers.
So, what’s the right amount of product to display? It depends on the size of your store, the type of retail experience you want to create, and how you want shoppers to perceive your business.
If you own a high-end boutique, curate a limited assortment of products and display only a few at once—like the example below from high-end footwear retailer KEEN. Conversely, discount retailers who want to use every inch of floor space to sell as much as possible can pack the store with merchandise.

Leave space for fixtures and fittings
Even in a discount store packed with merchandise, customers still need personal space. They shouldn’t have to squeeze past fixtures or brush against them.
Incorporate cross-merchandising
Cross merchandising (also called secondary product placement) displays complementary products next to each other to boost average order value (AOV).
For example, if you sell jeans, you can display them on a table next to a rack with blouses to help customers easily find products to complete an outfit. Or, if you sell running shoes, place socks and running shorts nearby.
Use planograms for optimal product placement
Rearranging a retail store is no small task. Instead of dragging heavy furniture or removing all products from shelves, create a planogram—a diagram that maps out each product’s location (both in the store and on the shelving unit).
Planogram software like DotActiv, SmartDraw, and Shelf Logic helps you plan layouts digitally. You can also use sticky notes on poster board.
Product-placement best practices to consider when designing a planogram include:
- Place bestselling products at eye level.
- Group complementary products together.
- Use end caps for promotions.
- Place low-cost products near the checkout.
- Stock convenience products at the back of the store.

Change the layout regularly
How often you refresh your store displays can vary depending on how often you receive merchandise shipments, whether your products are seasonal, and how frequently shoppers return. For example, you might rotate products weekly or biweekly to see if it boosts sales.
Whenever you receive a new shipment, it’s important to display it immediately in a high-traffic area. The goal is to ensure customers don’t get too familiar with your offerings and stop coming in.
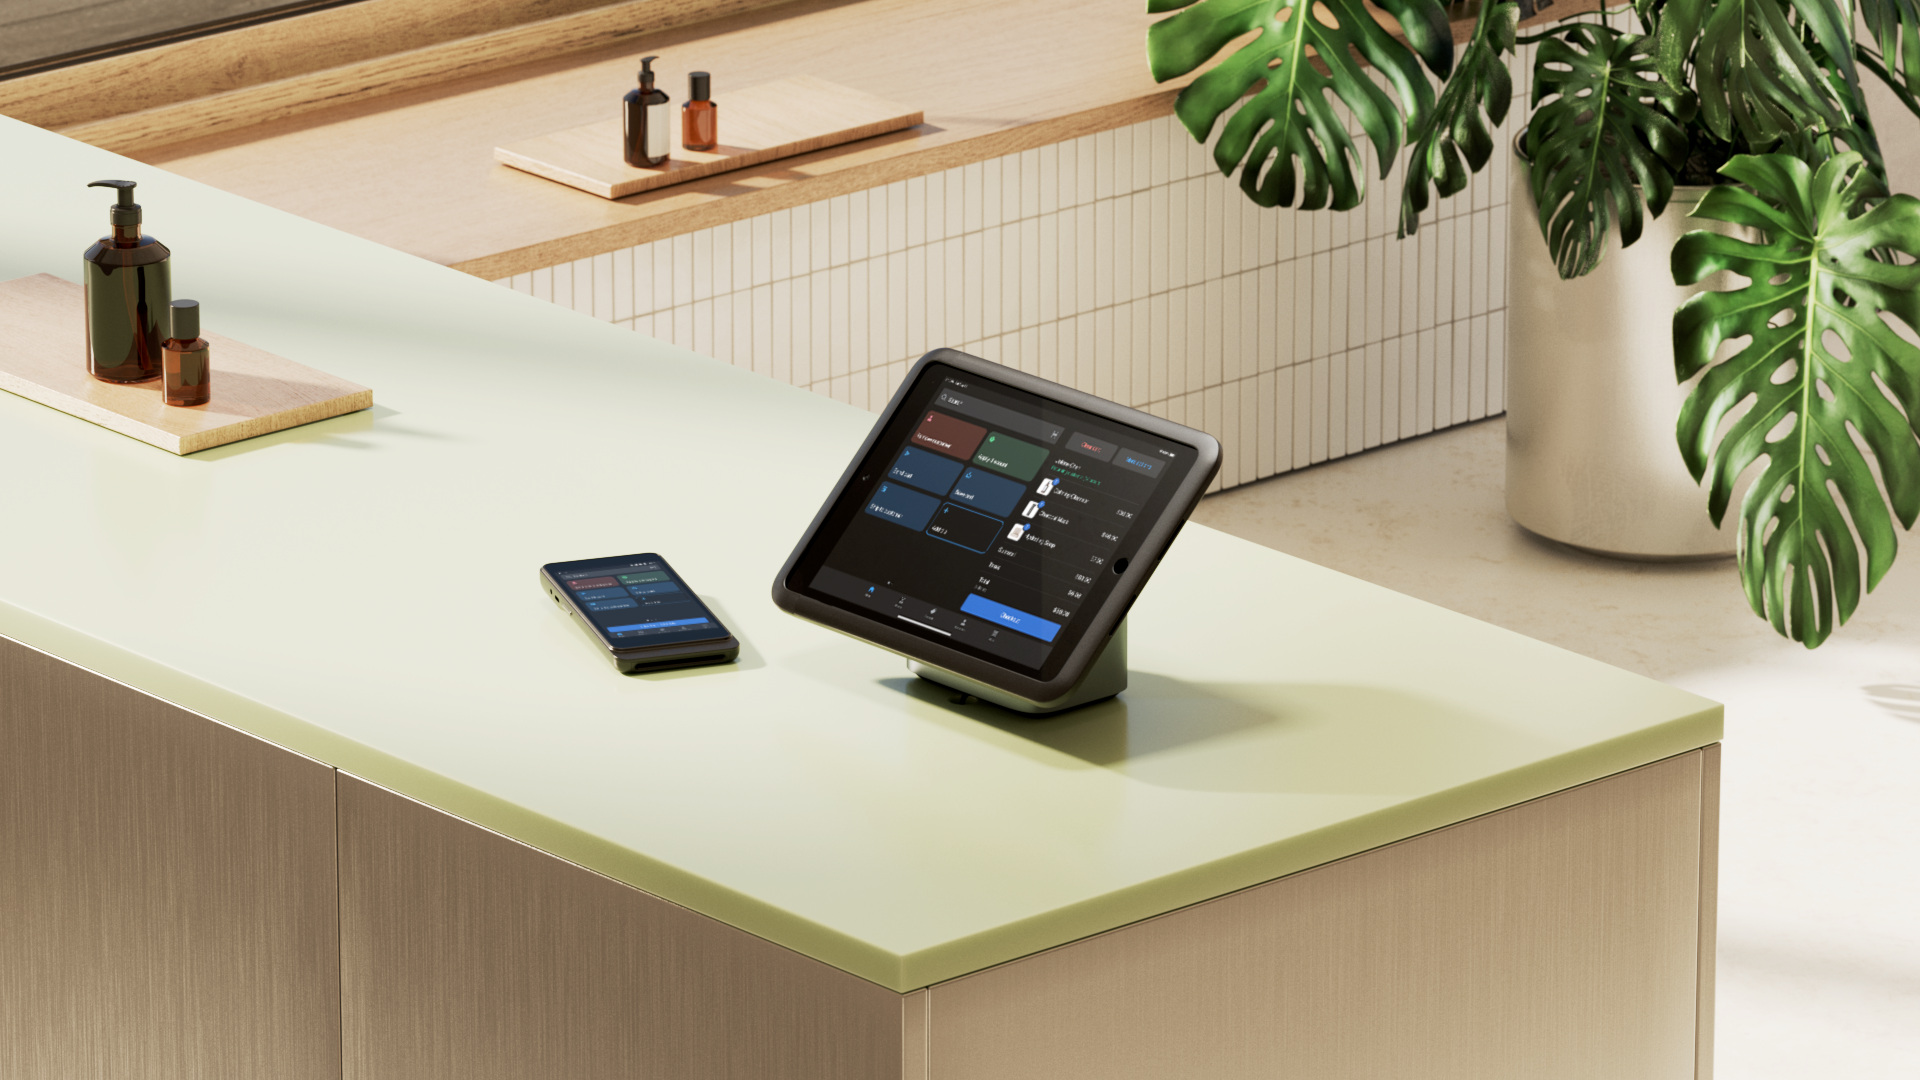
Find the right place for your POS system
Where you put your POS system affects how smoothly your store runs. The best spot is usually on the left side of your store, since customers naturally end up there after shopping (most shoppers move counterclockwise).
Staff should be able to see what's happening in the store while still being ready to help customers check out. This deters theft: people are less likely to target the store when they know they’re being watched.
If you have a larger store, add multiple checkout points or equip staff with a mobile POS untis to ring up sales anywhere. This helps during peak periods because it keeps lines short.
💡Tip: Tap to Pay on Shopify POS turns your smartphone into a credit card reader—no need for a designated checkout desk if you’d rather dedicate floor space to experiences or product showcases.

Integrate digital signage and interactive displays
Digital signage—such as touchscreens, video walls, or augmented-reality mirrors— keeps your store fresh. You can update content in seconds, giving you more opportunities to showcase products or promotions than a static print display.
Place these displays strategically in your layout. For example, you could:
- Promote seasonal products on window-facing screens.
- Play product-demo videos next to high-consideration products.
- Provide directions to specific departments, such as fitting rooms, checkout, or customer service desks.
Incorporate endless aisle capabilities
A small store shouldn’t limit sales. The endless aisle retail strategy treats your store as a showroom—a place for customers to browse limited quantities of your product catalog in the flesh, then place a ship-to-home order.
Add digital screens or kiosks to show customers everything you sell—even items that aren’t currently in-store. Treat these screens as digital shelves so shoppers can browse and buy items available online or at other locations.
Place them near related products or at aisle ends where shoppers look for more options. For example, place a kiosk near fitting rooms so customers can order other sizes or colors when a style isn’t in stock.
Consider eco-friendly layouts
Customers are becoming more aware of the environmental impact their purchases have. Deloitte reports a trend toward a more sustainable lifestyle, which you can reflect in your store design:
- Use sustainable materials for fixtures and displays.
- Opt for energy-efficient lighting.
- Incorporate plants and greenery to improve air quality.
- Choose digital signage instead of printed posters to reduce paper waste.
Your store’s layout can also support recommerce initiatives, such as repair stations or recycling points. Offbeat Bikes, for example, runs a service-and-repair center attached to the store. Customers can get bikes serviced and browse complementary products—helmets, rain covers, and travel racks—while they wait.
“Shopify makes the customer experience I want to offer customers possible, without burdening me with more admin work,” says store owner Mandalyn Renicker. “It was easy to migrate, easy to learn, and makes running my business more straightforward than it used to be.”
📚Learn more: Offbeat Bikes Improves its Customer Experience by Switching to Shopify POS
Use data analytics to optimize retail space
By analyzing which areas of the store are performing well and which need improvement, you can pinpoint whether the store design is driving profit or causing lost sales.
If you find that some areas get little foot traffic and inventory doesn’t move, reevaluate the overall design or that area’s layout to improve flow.
Use retail analytics tools to collect:
- Foot traffic counters: Track entries, exits, and visited areas. Use them to identify “dead zones,” then reposition displays or add attention-grabbing signage to draw shoppers.
- POS data: Track bestsellers and underperformers, then compare sales to product placement. If sneakers sell best online but not as well in-store, move them to a more visible area and track the impact.
- Customer feedback surveys: Use apps like Grapevine and LoudHippo to automatically survey customers after in-store purchases. Ask: Did they enjoy the experience? Was it easy to find items? How could it improve?
Real-world retail store layout examples
Motel a Miio
Motel a Miio is a home furnishings brand known for their aesthetically pleasing ceramics, so it makes sense that the retail store layout puts their products front and center.
This store uses a free-flow layout. With designated sections by product type and wall displays to maximize space, shoppers are encouraged to discover products. Ambient lighting and neutral colors make the store feel welcoming.
💡Discover:How Motel a Miio increased stock turnover rate by 12% with Shopify POS

I Miss You Vintage
I Miss You Vintage is Toronto’s premier luxury designer-label resale destination. It’s not your usual vintage shop where you have to comb through endless racks of merchandise to find a gem.
Instead, it uses a mostly geometric layout to merchandise products in a colorful way and does a great job of cross-merchandising. Shoppers can find dresses, shoes, and bags all on one rack, and the outfits are already color-coordinated.
Good American
Inclusive denim brand Good American has taken the fashion world by storm. Once an ecommerce-only brand, they opened their flagship store in Los Angeles—home of their celebrity founder, Khloe Kardashian.
The brand carefully designed the layout of their store. Their mission—to make denim more inclusive—shows up everywhere, from mannequins that represent different body types to digital signage that highlights the product’s unique selling points.
💡Discover: Good American unifies its commerce stack and reduces in-store returns by 20%

Little Mountain Vancouver
Little Mountain’s Vancouver store is a cozy boutique offering thoughtfully curated clothing in elegant styles. It embraces a free-flow layout, letting shoppers explore at their own pace while browsing thoughtfully displayed collections.
Mannequins showcasing styled outfits are scattered throughout the space, creating focal points that inspire outfit ideas. The racks are arranged in small clusters and color-coordinated to draw attention to seasonal palettes and trends.
Decorative accents like plants, framed artwork, and vintage rugs give the store a warm, boutique feel, making the shopping experience personal and inviting.
Improve your retail store layout with these design ideas
When deciding on a layout for your retail space, carefully consider your products, desired customer behavior, and the square footage you have available. If you have many dissimilar products, consider the grid layout. A smaller number of products may work well in a free-flow layout. If you want shoppers to slow down and browse, consider mixing loop and free-flow styles.
Getting the bones of your store right matters and can directly affect sales. It’s often trial and error. You might need to test several layouts before settling on the one that’s right for your store.
Retail store layout FAQ
What are the four store layouts?
Four of the most common retail store layouts are grid, loop, geometric, and herringbone.
How do you organize a retail shop?
- Define your goals
- Analyze your existing space
- Map the customer journey and desired flow
- Choose the right layout type
- Select fixtures and fittings
- Consider accessibility and legal compliance
- Set a budget for implementation
What is the best layout for a retail store?
Grid layouts are the most common option. However, they work best when you have ample space. Smaller stores may prefer boutique-friendly or free-flow store layouts.
How do you create a store layout?
To create a store layout:
- Analyze customer flow
- Plan for the right turn
- Add a decompression zone
- Consider window displays
- Add breaks and stopping points
- Leave space for fixtures and fittings
- Draw up a planogram
How many types of store layouts are there?
There are about 10 different types of store layouts, including grid, herringbone, loop or racetrack, free-flow, boutique, straight or spine, diagonal, angular, geometric, and multiple or mixed store layouts.
How to arrange products in a retail store?
When arranging products in a retail store:
- Create a “power wall” to cater to the right turn
- Place bestselling products at eye level
- Group complementary products together
- Use end caps for promotions
- Place impulse buys near the checkout
- Create clear signage
- Rotate product arrangements regularly
What is the most common store layout?
Grid layouts are the most common retail store layout type. With this design, aisles are arranged in straight lines and products are stacked on vertical shelving units. It’s popular among grocery stores, pharmacies, and convenience stores.